Has your project manager ever requested that you print a Gantt chart and associated activity table for a presentation at a Stakeholders meeting? It can be a bit of a challenge because you want the print out to be aesthetically pleasing and well understood. And, as this document is a visual representation of the schedule, it is important to the stakeholders that it displays the progress of a project in a easy to read way.
Although some of the print features in Primavera P6 EPPM are similar to Microsoft Word, there are some aspects supported by Primavera which help to present this important task. Let’s take a closer look.
First, we select the columns that we want to include in our activity table. In this example, we decide on five columns, so that we can fit our activity table and all of our Gantt chart on one sheet of paper (measuring 11 x17) as in our sample ‘Wellmont Substation’ project below in Figure 1.
 Figure 1

Now we turn our attention to the Gantt chart. By right-clicking on our date or month headings a dialog box appears, and we select ‘Month/Week’ as displayed in Figure 2.
Figure 2
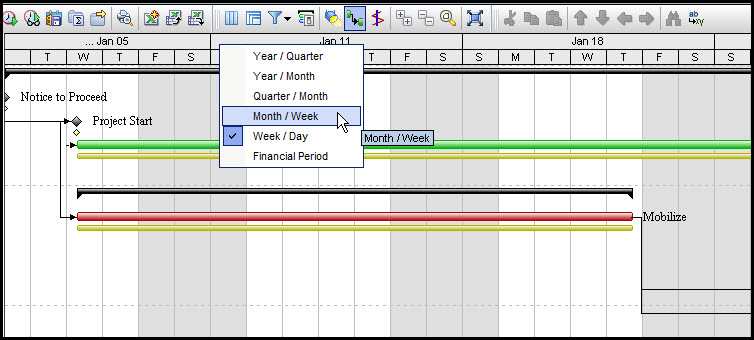
For our ‘Wellmont Substation’ project, Month/Week is the correct selection because once applied our whole Gantt Chart is displayed next to our activity table, as shown below in Figure 3.
Figure 3

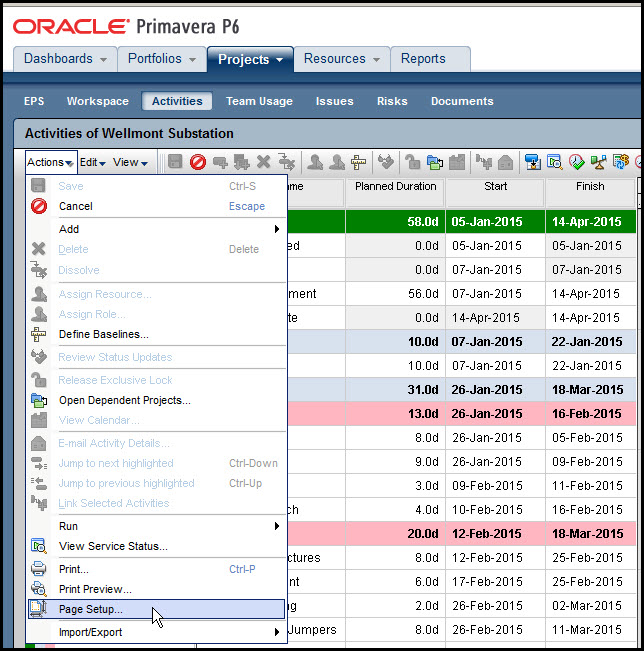
We are ready to focus on printing our activity table and Gantt Chart, we select ‘Actions’ and ‘Page Setup’ as shown in Figure 4.
Figure 4
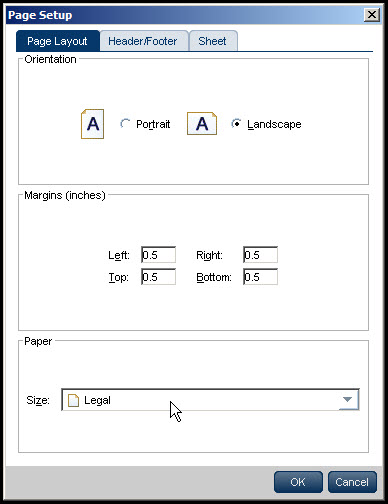
In the ‘Page Setup’ dialog box we select the ‘Page Layout’ tab and set the ‘Orientation’ to
Landscape and ‘Paper’ size to legal, which is 11×17, as in Figure 5.
Figure 5
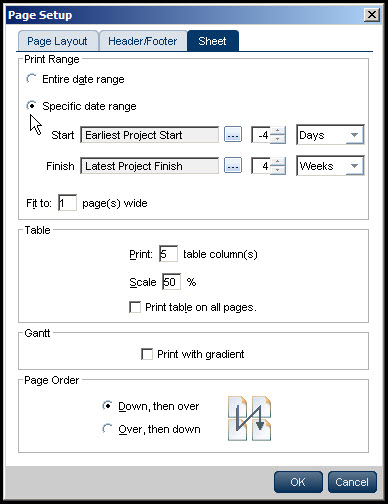
By selecting the ‘Sheet Tab’ we can set the ‘Print Range’. We check the ‘Specific Date Range’ and in ‘Start’ we enter ‘Earliest Project Start’, ‘-4’, and ‘Days’. By selecting -4 days we will be able to provide space on our print out for activity relationships at the beginning of the schedule (like “Notice to Proceed and Project Start”) on our Gantt chart.
Then in the ‘Finish’, we enter ‘Latest Project Finish’, ‘4’, and ‘Weeks’. The extra four weeks will be needed to show the last activity names (“Project Management, Project Complete, and Substantial Completion”) which are all printed to the right of the activity bar in our Gantt chart.
In the ‘Table’ section, we select 5 columns (the number of columns we originally selected in Figure 3, for our activity table) and we select 50% for our ‘Scale’, as displayed in Figure 6.
Figure 6
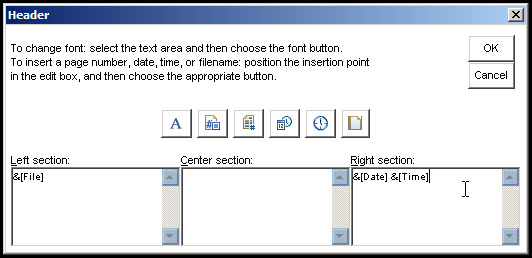
Next, we select the Header/Footer tab, and by selecting ‘Custom Header’ we enter our file name, ‘Wellmont Substation’ in the ‘Left’ section and the ‘Right’ section we enter the Date and Time, as displayed in Figure 7.
Figure 7
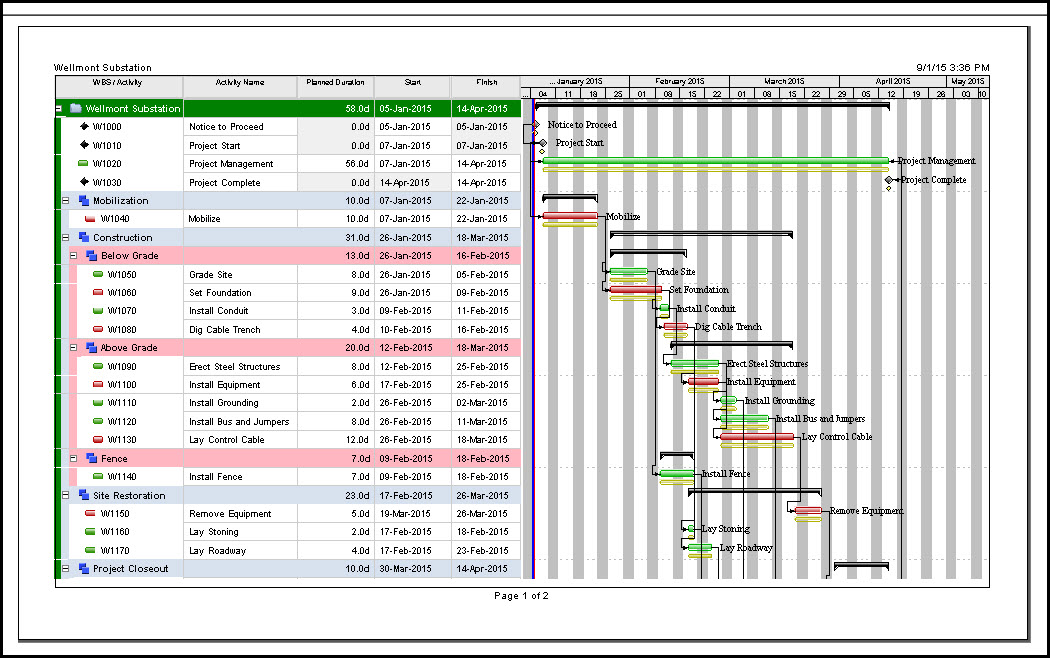
Last, we select the ‘Footer’ tab and enter our page number in the ‘Center section’. We select, print preview, as in Figure 8 and realize that our print out will be two pages.
Figure 8
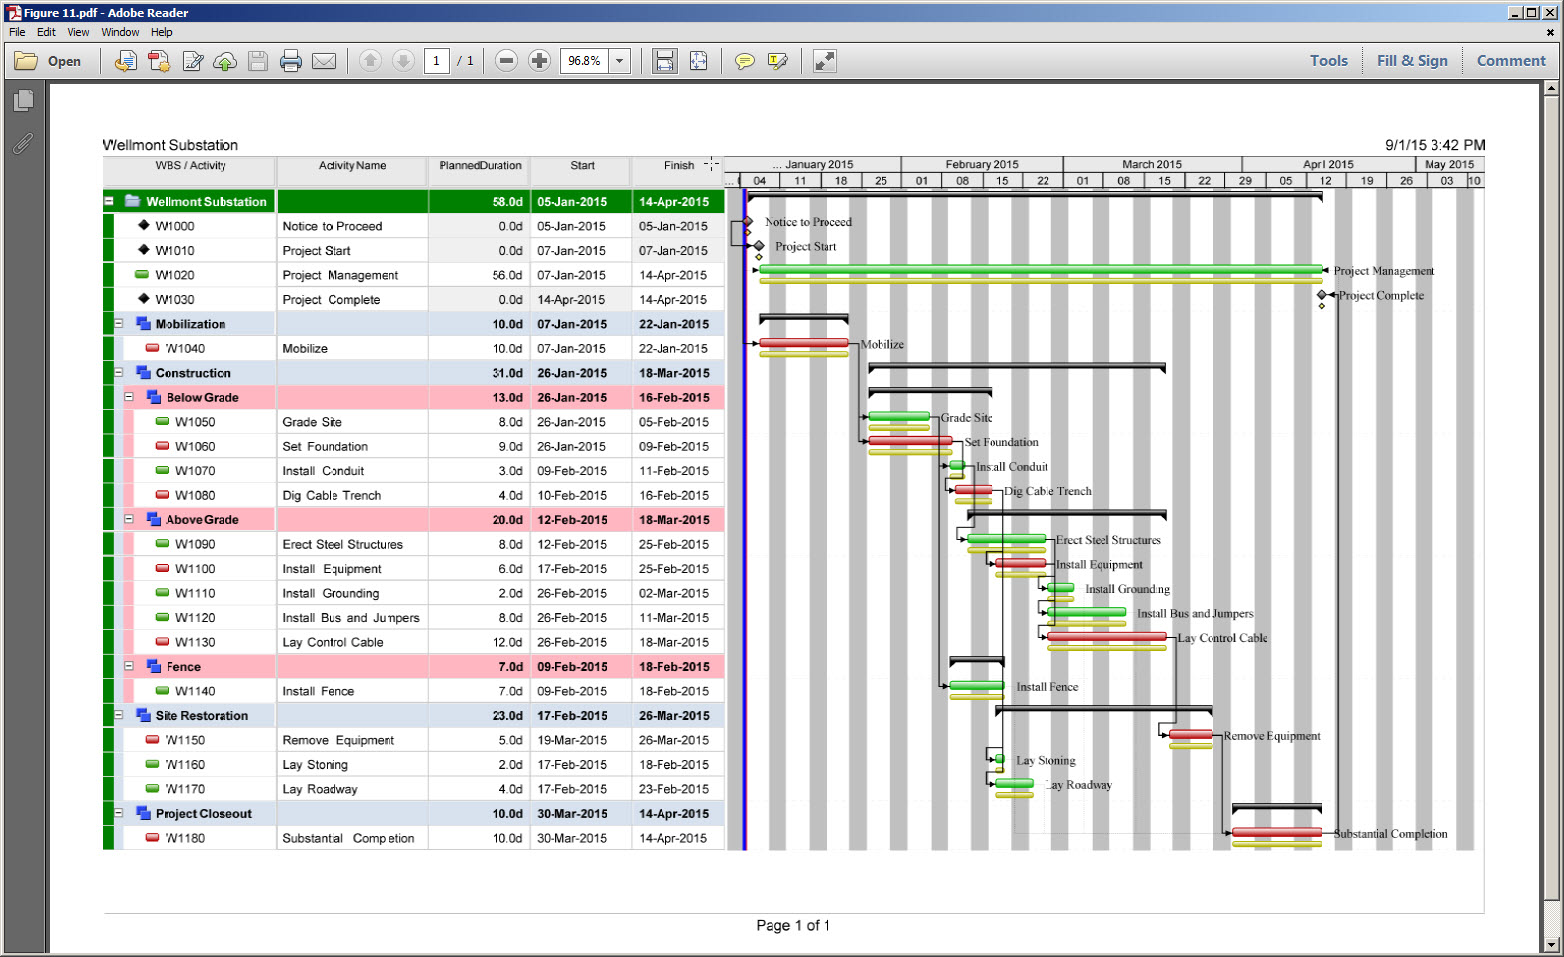
Well, everything is aesthetically pleasing, except we wanted our Gantt chart and associated activity table all on one page. So, we need to make some further adjustments. By returning to the ‘Page Setup’ dialog box we reduce the ‘Scale’ to 45%. Our resulting ‘Wellmont Substation’ Gantt chart and associated activity table now fit onto one page as shown in Figure 9.
Figure 9
Summary
It’s quite straight forward to print out a Gantt chart and associated activity table, on one sheet of paper in Primavera P6 EPPM. As we have demonstrated, you may have to adjust the scale to fit all of your information onto one page.
Exactly what you decide to print is down to personal preference, for example, a lot of schedulers may prefer to select six columns in their activity table so that activity percent complete, is included. A good tip is using the ‘Earliest Project Start’ minus a few days and the ‘Latest Project Finish’ plus a few weeks’ features, so that the Gantt chart, bar labels are all visible from the start to the finish.
The print variations are endless, with the ‘Header’ and ‘Footer’ features. Accordingly, your organization and your personal preference, will help with your decision of labelling choice and where you place them on the page.