An Introduction to the Critical Path Method
Have you heard the term ‘critical path’? The critical path is the shortest journey through the project’s tasks, taking into account how tasks link together. Armed with that information, you can predict the project’s completion date, assuming nothing changes and no tasks are delayed.
It’s a very powerful tool for project scheduling, and essential to understand if you are creating a project Gantt chart or simply want to get your work done as quickly as possible. So how do you work it out? Enterprise project management tools give you a shortcut to the critical path, but unless you understand what the tool is telling you, you won’t be able to use that information effectively for your scheduling.
In this article we’ll give you a brief overview of Critical Path Method, and we should start by defining what it is.
What is Critical Path Method (CPM)?
Critical Path Method, which you’ll also see abbreviated as CPM, is a scheduling technique that combines task and dependency information with resource estimates to calculate the shortest amount of time necessary to complete the project. That gives you the critical path.
If any task is delayed on the critical path, the end date of the project will also be delayed.
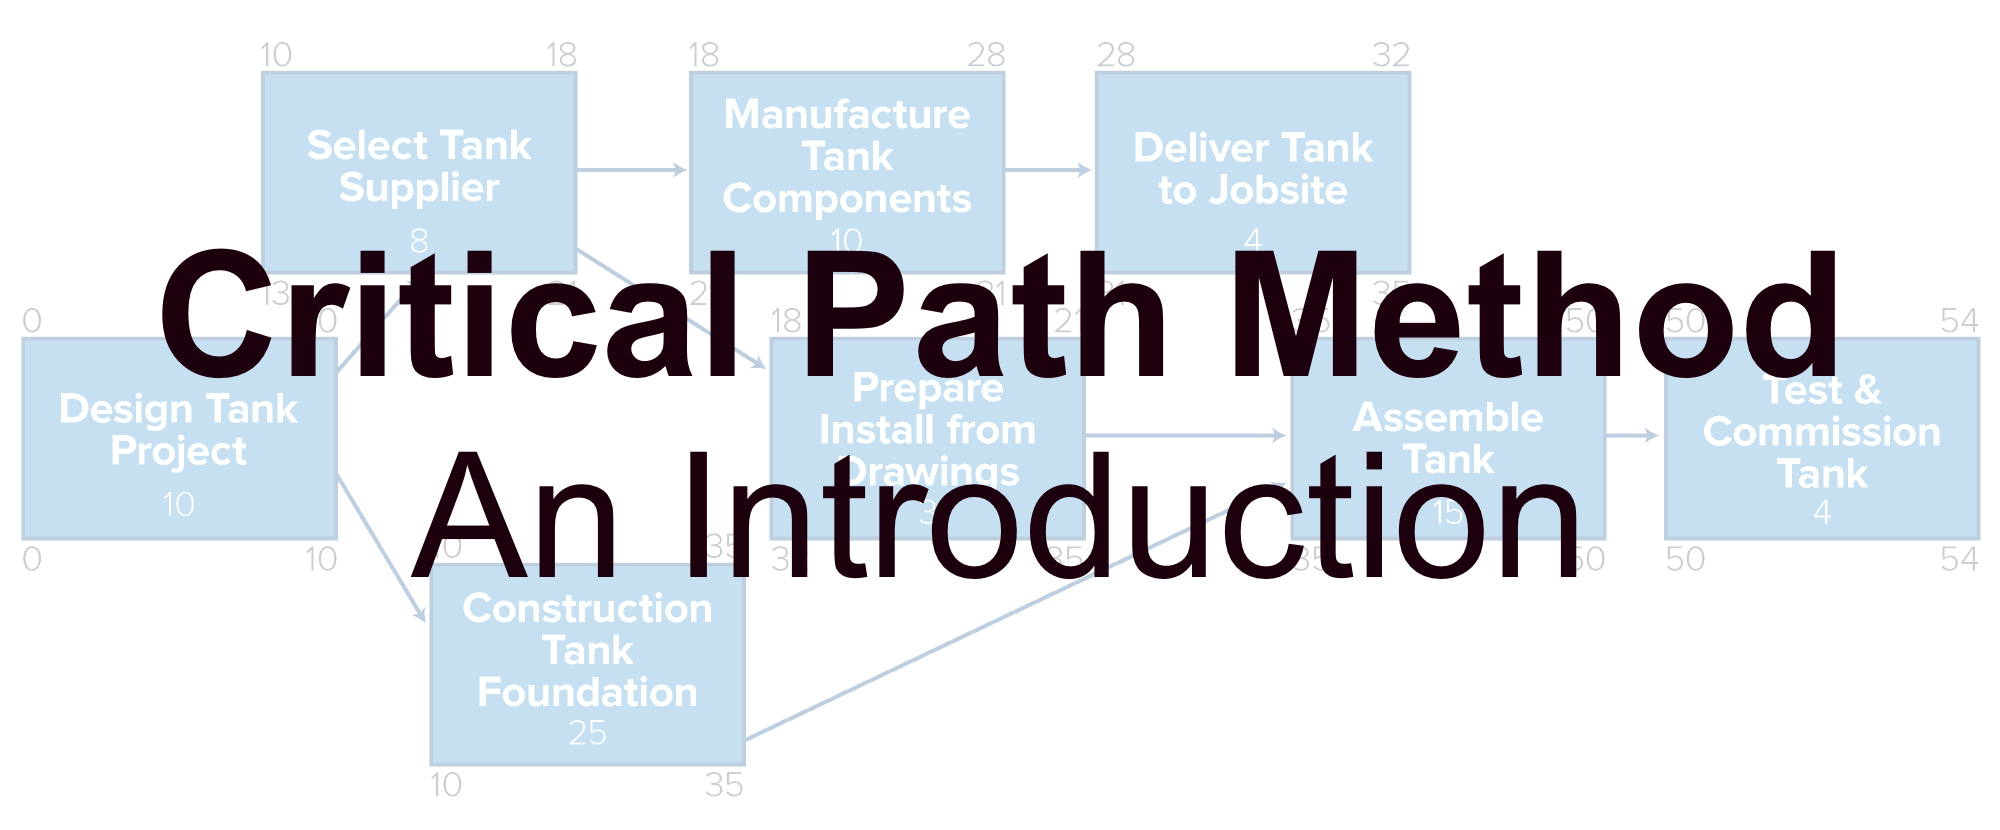
How to calculate the critical path
In days of old, working out a project’s critical path used to be a manual exercise – and we remember attending project training courses ourselves where we had to calculate the critical path by hand as part of the class. It is important to know how the critical path is worked out, so you’ll find many project management courses teach how to calculate the critical path of a project by hand using good old-fashioned drawings and calculations.
However, today, project managers are not expected to work out the critical path ‘long hand’. You’ll find all advanced project management scheduling tools like Primavera can do this for you, using the same techniques as you would do with manual calculations. The only difference is that tools are faster, and less likely to make mistakes with the math!
Simply click on the right view in your Gantt chart software, and you’ll see your project’s critical path highlighted.
To work out the critical path, you’ll need to have:
- A list of project tasks (use your work breakdown structure for this)
- An understanding of the dependencies between tasks
- Estimates for the work of each task.
Without this information, you won’t be able to work out the critical path (either manually or via your software – your tools are only as good as the data you put in).
Here are some other key terms you’ll need to know in order to make use of this technique.
Forward Pass
The first step in calculating the critical path is to do a ‘Forward Pass’. This simply means working out the earliest dates a task could start or finish.
Start at the beginning of the project and use task durations to inform when tasks can start or stop, assuming no gaps in the delivery.
Backward Pass
Next, you work out (or your project management software does it for you) the ‘Backward Pass’. Start at the end of the project and work out the latest dates a task could start or finish.
Sometimes you’ll find that the backward pass dates are the same as the forward pass dates, but sometimes you’ll see that they are different. That difference is important for our next piece of jargon…
Total Float Calculations
Float is the time by which a task can be delayed before it affects the next activity in the project. Float is helpful because it provides some wiggle room in your project schedule. If the task finishes, let’s say, a day late, you know that isn’t going to affect the start date of the next scheduled task. You can let that task slip until the day the next task is scheduled to begin – then the delay starts affecting the rest of the project.
Float is useful information to know because it helps you manage the project more effectively and make better scheduling decisions. However, you do have to stay on top of float – it gets used up more quickly than you might imagine! When that happens, the task may stray on to the critical path, giving you a different challenge to manage.
We cover all of these terms in far more detail during our project management fundamentals training course.
How to use the critical path
What the forward pass and backward pass information identifies is which tasks have wiggle room (float) and which don’t. The tasks that don’t form your critical path. As a project manager, you can then manage the critical path tasks carefully because you know that if any of them are delayed, the end date of your project will also be delayed.
Luckily for us today, modern project management software tools have features built in to help understand and manage the critical path. You can switch on a view to see the critical path, create baselines and track the progress of critical tasks.
An article can only go so far in explaining the value of CPM and how to do it. What really makes the difference for understanding is going through a few worked examples and seeing how project task information can be used in practice to generate start/end dates and float to give you the critical path. An experienced trainer can explain the complicated aspects of the calculations and bring the technique to life with real examples. That’s why we cover CPM in our Project Management Fundamentals class, because it’s a technique that can make the difference between on time delivery and bringing your project in late. When you know your critical path, you can make smart decisions to keep the project moving in the right direction and reach your milestones successfully.